Clocking in (two methods):
- Manually through timesheets → selecting job and location. or
- When the first bin is scanned/logged in Picking module, worker (supervisor) is automatically clocked in
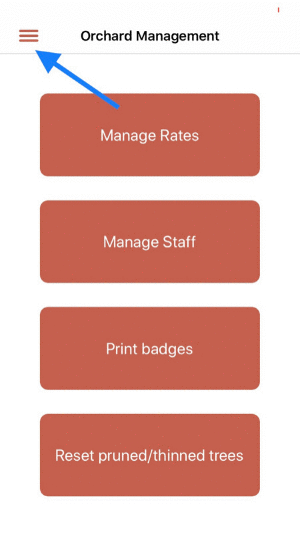
Step 1: Click on the hamburger icon on the top left corner of your screen.
Step 2: Select Cherries
Step 3: Now to create a bucket, select a picker.
Adding a bucket manually:
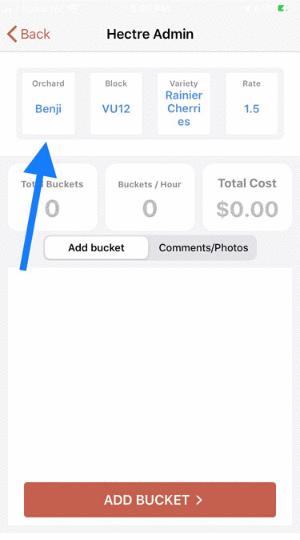
Step 1: Once you’ve selected your picker, select an orchard, block, variety, and rate for the picker to work on.
Step 2: Add buckets by clicking on the ADD BUCKET button. A bucket is now added to the selected picker.
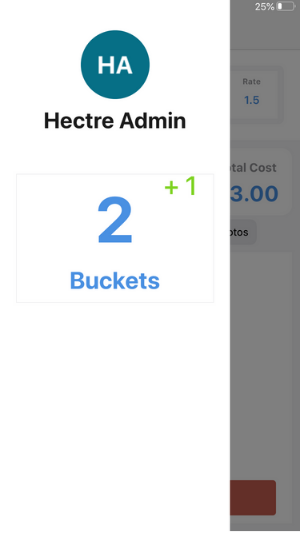
Step 1: To add an additional bucket, click on the ADD BUCKET button again. This adds an additional +1 bucket to this picker.
Note: Adding consecutive buckets may not happen immediately. The primary reason being to protect against fake buckets being issued to pickers. You can set the delay for this by logging in to the dashboard through the desktop. Navigate to
Admin → General → Consecutive scans delay. You can now set the delay (in seconds) between 2 scans when adding a bucket.
Apart from adding buckets manually, you can alternatively also scan the QR code on the picker(s) badge to add a bucket.
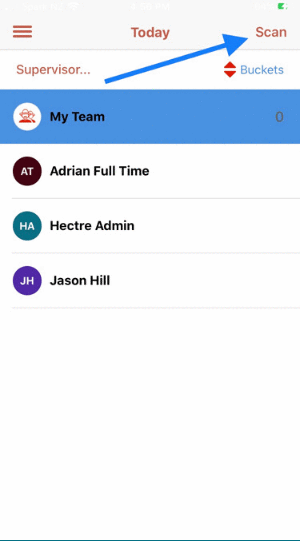
Step 1: Navigate to the Cherries menu. (Hamburger icon → Cherries).
Step 2: Select ‘Scan’ from the top right corner of your screen. Upon selection, it should read ‘Names’.
Step 3: Select your picker.
Step 4: Click on the round red button to scan the QR code on the picker’s badge and add a bucket. You should hear a ‘beep’ sound upon successfully scanning a badge.
Note: Do not expect the camera to turn on upon clicking the scan button. Just align your iPhone/iPad’s camera with the QR code to scan. This is an intentional feature to save the battery on your device.
Contact us to find out how we can help transform your orchard.
© 2024 Hectre. All Rights Reserved.
BOOST
YOUR FARM'S PERFORMANCE
Ask us a question
& one of our friendly team will get in touch shortly :)Not ready right now?
But know you need to do something...
Ask us a question
& one of our friendly team will get in touch shortly :)Spectre Mobile Fruit Sizing
Join the leading packhouses who are gaining the Spectre edge
Ask us a question
& one of our friendly team will get in touch shortly :)